Spark plugs sit at the center of the ignition system. Their job is simple—ignite the air-fuel mixture at exactly the right moment—but when that spark weakens, engines don’t hide it for long.
Misfires, rough idle, cold-start complaints, and rising fuel consumption often trace back to ignition issues. Testing spark plugs before replacing them helps avoid guesswork, unnecessary parts swaps, and repeat comebacks.
This guide follows the same diagnostic logic technicians and parts professionals use every day to isolate problems, protect customer trust, and keep vehicles from coming back on the hook.

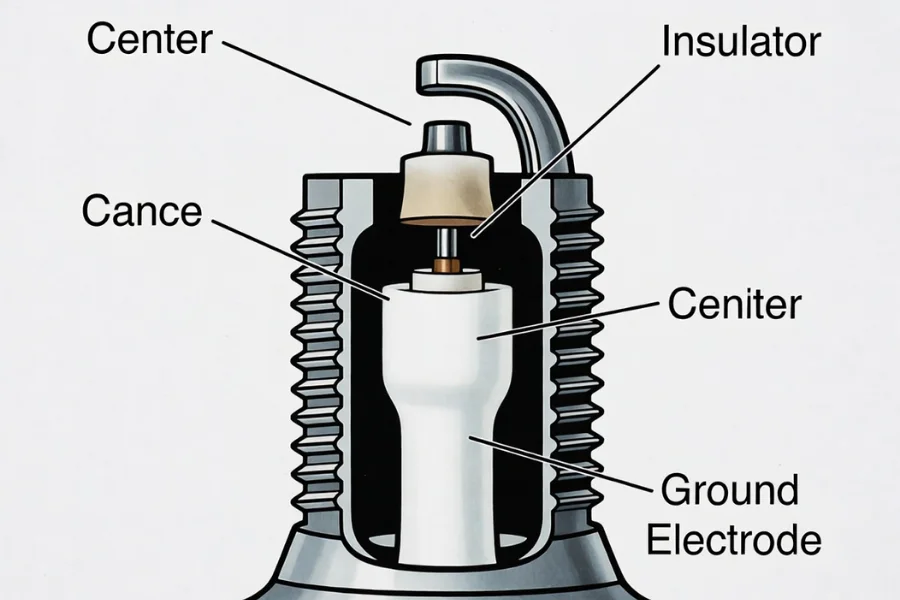
A spark plug may look simple, but every piece has a purpose:
Terminal connector – Transfers high voltage from the coil or plug wire
Center and ground electrodes – Create the spark across a controlled gap
Ceramic insulator – Keeps high voltage contained and prevents grounding
Metal shell – Grounds the plug and transfers heat into the cylinder head
When any of these parts degrade, spark quality drops—even if the plug still looks usable.
The ignition coil steps battery voltage up to tens of thousands of volts. That energy travels through the wire or coil boot and into the spark plug. Once voltage overcomes the resistance at the electrode gap, the spark jumps and ignites the mixture.
At the same time, the plug sheds heat into the engine. Too much heat burns electrodes. Too little heat causes fouling. That balance is why plug condition reflects what’s happening elsewhere in the engine.

Spark plug issues usually show up under stress—cold starts, heavy load, or idle. Watch for:
Engine misfire or hesitation
Hard cold starts
Noticeable fuel economy drop
Rough or noisy idle
Sluggish acceleration
Abnormal exhaust smell or a check engine light
These symptoms often overlap with coil, wire, or fueling problems, which is why testing matters more than assumptions.
Let the engine cool completely. Disconnect the negative battery terminal. Wear insulated gloves and eye protection. Modern ignition systems produce high voltage even at idle, so basic precautions matter.
A multimeter capable of resistance testing, a spark plug socket with ratchet and extension, and a spark plug tester if available. Dielectric grease, a clean shop cloth, and the vehicle service manual help ensure correct torque values and resistance specifications.
Disconnect the ignition wire or coil-on-plug unit. Remove the spark plug using the proper socket and keep plugs organized by cylinder. Patterns across cylinders often matter more than a single bad plug.
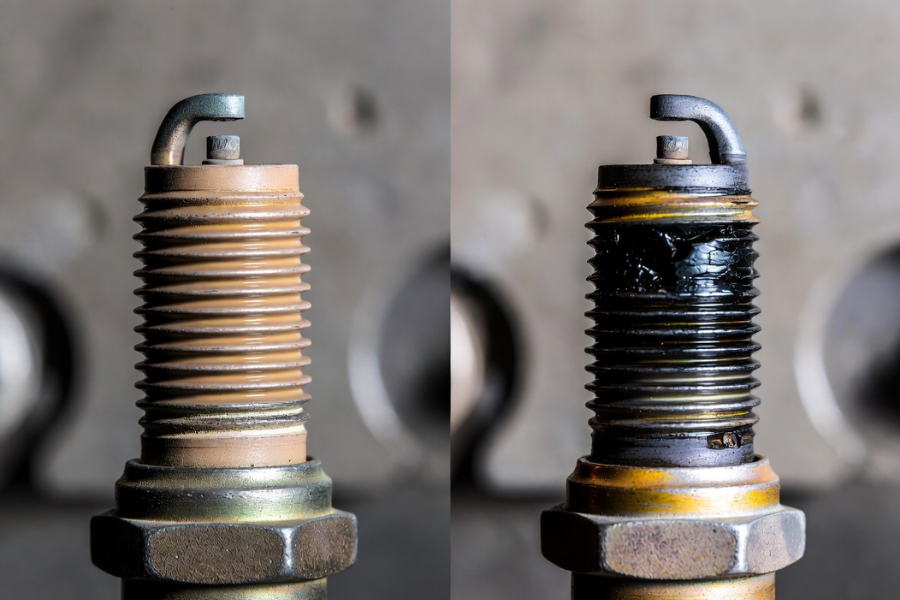
Normal plugs show light gray or tan deposits with even electrode wear. Warning signs include severely worn electrodes, heavy carbon buildup, oily deposits, cracked ceramic insulators, or melted and distorted electrodes caused by overheating or timing issues.
Spark plugs rarely fail alone—they reflect broader engine conditions.

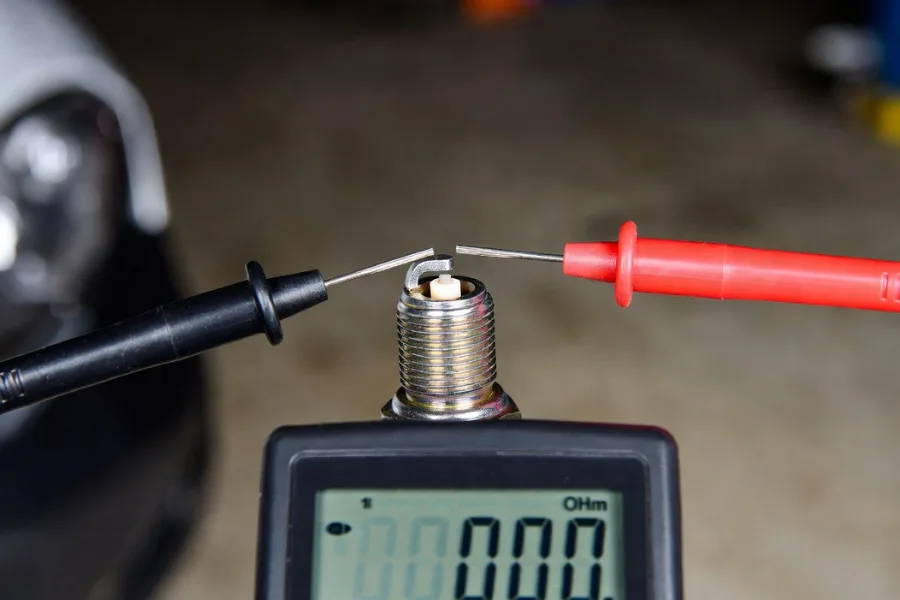
Set the multimeter to the ohms range and place one probe on the terminal and the other on the center electrode. Many resistor-type plugs typically measure between 4,000 and 8,000 ohms, while some designs fall in the 5,000 to 15,000 ohm range. Always verify specifications in the service manual, as resistance values vary by design.
No reading usually indicates an internal break. Unstable or out-of-range readings point to a failing internal resistor. Any reading between the terminal and metal shell indicates insulation failure.
Install the plug in the tester and ground it properly. Crank the engine and observe the spark. A strong blue spark indicates healthy ignition. A weak yellow spark or no spark at all usually means replacement is required.
On modern coil-on-plug systems, this test should be used carefully. ECM strategies and CAN-bus control can mask faults under no-load conditions.
Inspect wires for cracks, burns, or hardened insulation. Measure resistance and compare readings across all cylinders. Confirm proper routing away from exhaust heat and sharp edges. Uneven resistance can overload coils and shorten component life.
Match the part number exactly. Thread plugs by hand first to prevent cross-threading. Torque to manufacturer specifications—over-tightening causes more failures than under-tightening. Apply a small amount of dielectric grease to the boot only, then reinstall coils or wires in the correct order.
Consistent ignition performance depends on component quality. Reliable suppliers like SUMATE focus on durability and stable operating characteristics that help reduce repeat failures in real-world service environments.
Reconnect the battery and start the engine. Idle should be smooth, with no warning lights. If issues remain, the root cause may be coils, fueling, compression, or control strategy—not the spark plug itself.
Copper plugs typically require replacement every 20,000 to 30,000 miles. Platinum or iridium plugs often last 60,000 to 100,000 miles. Best practice is to replace plugs as a complete set, verify gap when applicable, and follow OEM heat range and design specifications.
Can I tell if a spark plug is bad just by looking at it?
Often, yes. Heavy electrode wear, carbon buildup, oil fouling, or cracked ceramic usually indicate a failing plug. Visual inspection can reveal system-related issues, but it doesn’t confirm electrical integrity. Resistance testing helps verify whether the plug can still carry voltage reliably under real operating conditions.
How to test a spark plug using a multimeter?
Set the multimeter to the ohms range and place one probe on the terminal and the other on the center electrode. Most resistor-type plugs fall within a specified resistance range. No reading, unstable values, or readings outside spec usually indicate internal failure and justify replacement.
What if I don’t have a multimeter or spark tester?
You can still perform a visual inspection and evaluate engine symptoms such as misfires, rough idle, or hard starting. A spark tester offers clearer results if available. While these methods help, resistance testing remains the most reliable way to confirm electrical integrity.
What should a spark plug ohm out at?
There is no single value for all spark plugs. Many resistor-type plugs typically measure between 4,000 and 8,000 ohms, while others may read higher depending on design. Always verify resistance specifications in the vehicle service manual or manufacturer documentation.
Do spark plug wires need regular replacement?
Yes. Spark plug wires degrade over time due to heat and vibration. Most should be inspected every 5–7 years or 60,000–80,000 miles. Cracked insulation, corrosion, or inconsistent resistance can overload ignition coils and cause intermittent misfires or performance issues.
Should I use grease during spark plug installation?
Use dielectric grease only on the spark plug boot, not on the threads. It improves sealing, prevents moisture intrusion, and makes future removal easier. Applying grease to threads can affect torque readings and increase the risk of improper installation.
Modern diagnostic tools help, but they don’t replace experience. Engines are systems, not single parts. Skilled technicians—and reliable components like those supplied by SUMATE—are what keep vehicles running efficiently and comebacks off the schedule.